Body
You can use progress tracking as a tool for students to keep track of their course progress. As an instructor, you can turn on progress tracking for your courses once the administrator has turned it on for your institution.
Progress Tracking and Student Progress Reports
You can turn on this function to give your students an easy way to keep track of what they've done in your course. You can turn progress tracking on at any time. Progress tracking is behind a feature toggle and administrators can decide whether they want to give instructors the ability to turn this feature on or off at the institution level.
If you turn on progress tracking after the beginning of the course, participatory items are retroactively marked as complete. For example, assessments previously submitted by students are marked as complete. Non-participatory items, such as Ultra Documents, will still need to be manually marked by students.
Turn progress tracking on for your course:
- Select Courses from the Ultra navigation menu.
- Select a Course.
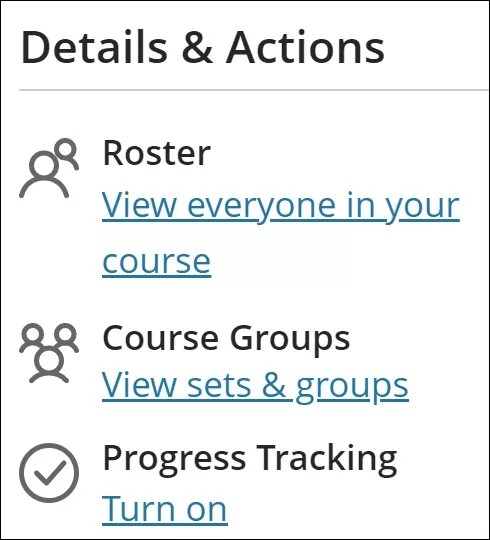
- Under Details & Actions > Progress Tracking, select Turn on.
- After the Progress Tracking panel opens, switch the toggle from off to on.
- Save your new settings.
Your students will now see their progress in the course. All content displays an icon showing a student's progress. When all content in a folder or module has been completed, the entire folder is automatically marked as complete.
Before a student has accessed content, the Progress icon is an empty circle:

After a student has accessed content, the Progress icon is a half-filled circle:

For items that are submitted, the Progress icon turns to a green checkmark to indicate that the item is completed. If the item does not have a submission option, such as an Ultra Document, students will have to mark the item as complete themselves.

If you're looking for more information about student activity, visit the following help pages:
The Student Progress Tab
The Progress tab tracks individual student progress in a course. You can see completed and uncompleted tasks for each student. You can access the tab by selecting Progress in a student’s Student Overview. Visit the "Student Overview" topic to learn more about the Student Overview and ways to access it.
Content displayed on the Progress tab depends on the content availability. By default, the Content availability filter is set to Visible to students. Select All from the Content availability menu dropdown to see content that isn’t visible to students in addition to visible content. Content that isn’t visible to students has a lock icon beside it.
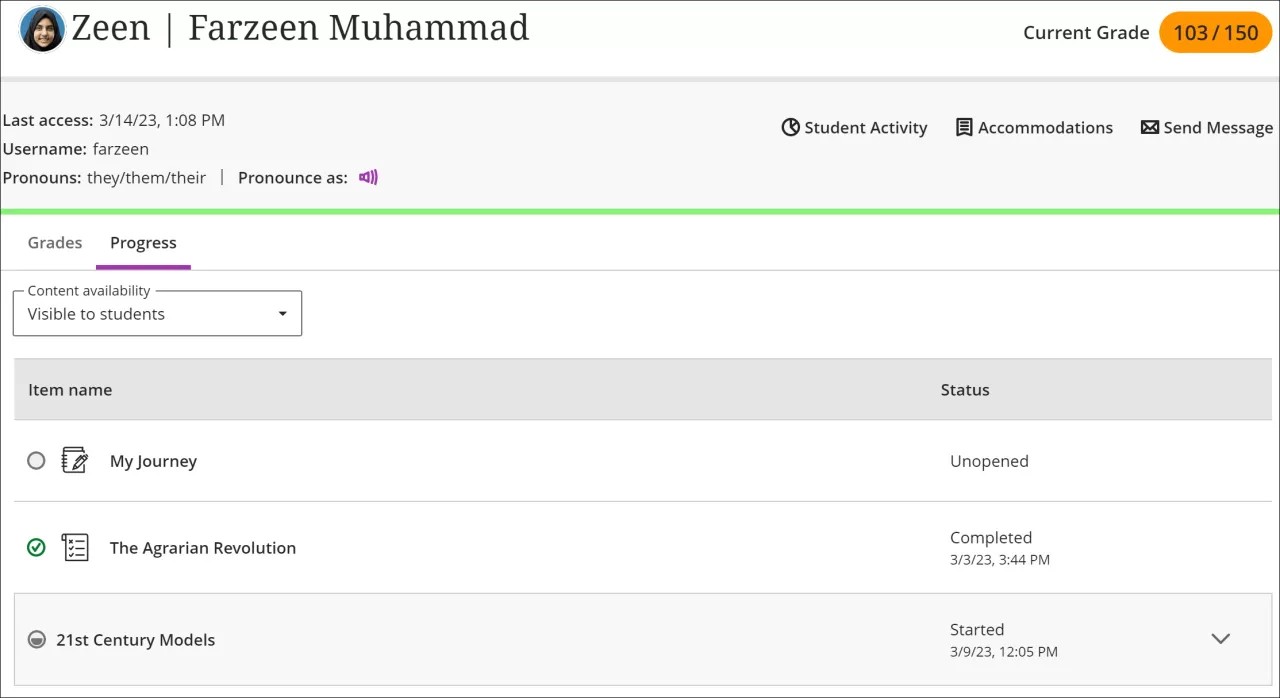
Student Progress Report for Course Content
Instructors need to know how their students engage with course content other than assignments. You can then take important actions, such as improving course content or reaching out to idle students. There are two ways to access this report.
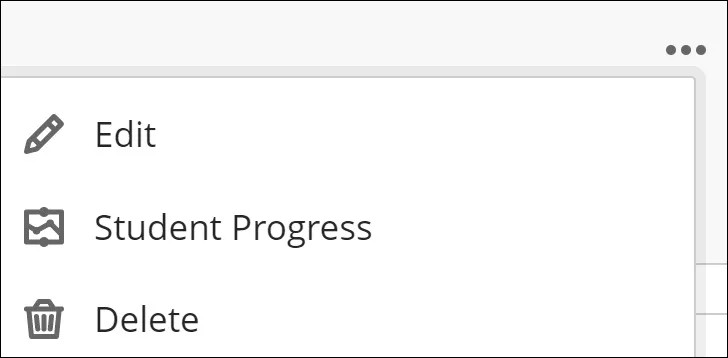
The first way is to select the ellipsis menu beside the content and then select Student Progress to access the Student Progress report.
The second way is to bring up the content's page and then select the Student Progress tab.
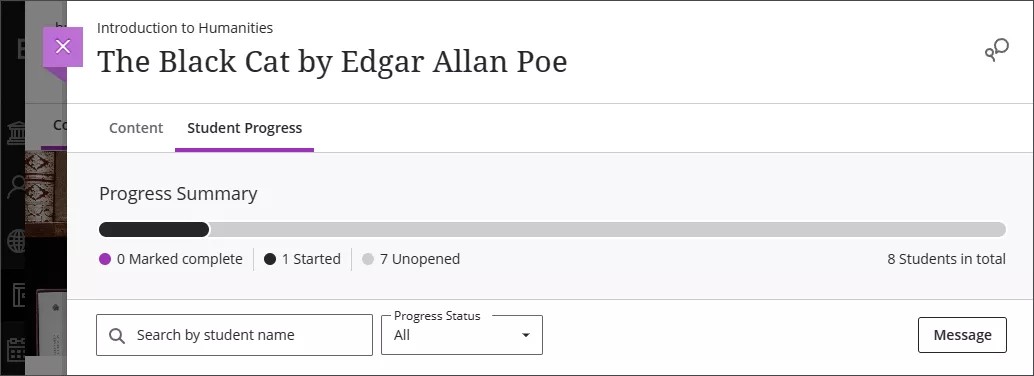
You can see the progress that students mark for the following content types:
- Ultra Documents
- SCORM packages
- Uploaded files
- Links
- Cloud documents
- LTI content with no associated grade
- Learning modules
- Folders
The report allows you to select content and view:
- Students who have not yet opened content
- Students who have accessed content
- Students who have marked the content as complete
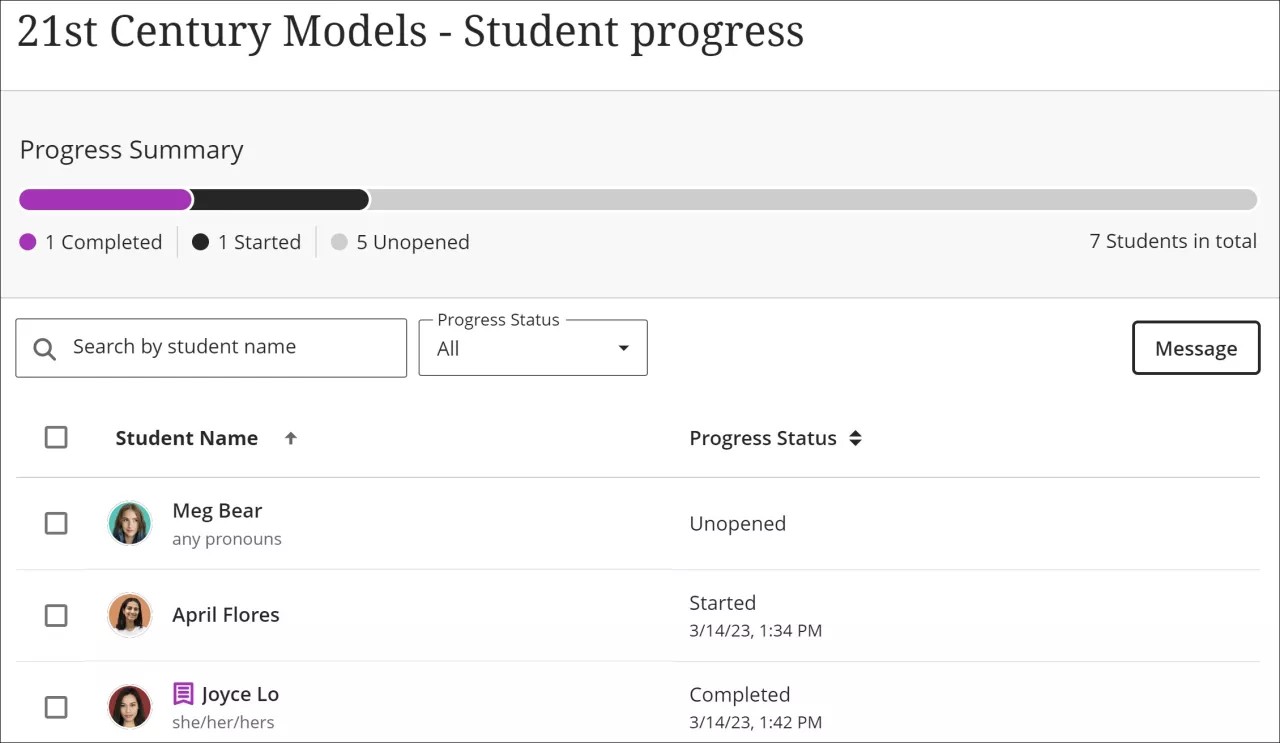
The report includes the date and time an action occurred (for example, when a student first selected content or accessed content through Ally). You can sort by student name or progress status. You can act based on this information by sending an individual or bulk message. If you send a bulk message, each student receives an individual message.
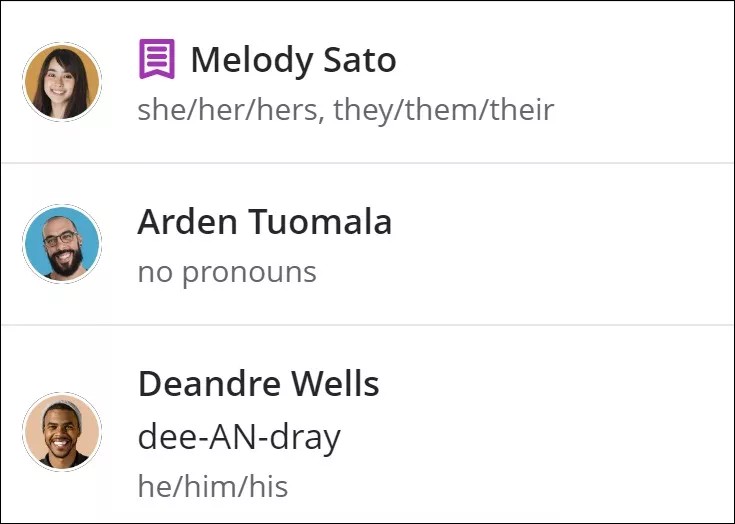
The Student Name list includes useful information for personalizing your interactions with students. If a student has provided this information, the list displays additional name, name recording, pronunciation, accommodations, and pronoun information.
Additional Information